Mastering R in Visual Studio Code: Installation, Configuration, and Debugging
Why R in VS Code?
As a leading language for statistical computing and graphics, R has become indispensable in data science workflows. While RStudio remains popular, Visual Studio Code offers superior extensibility and cross-language support. This guide will help you harness VS Code’s modern IDE capabilities for enhanced R development.
Installing Base Software and Extensions
Install R
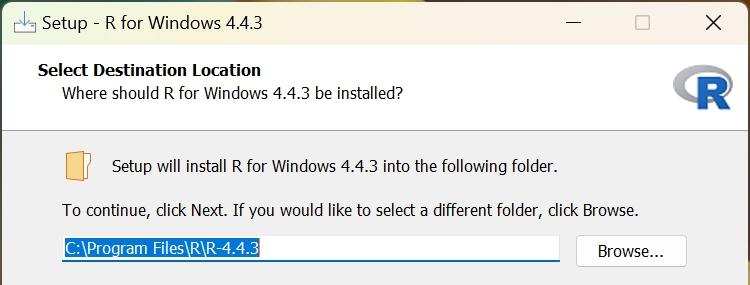
- Download and install R from
official website
- Add R installation path to system environment variables (e.g.,
C:\Program Files\R\R-4.4.3\bin) - Verify installation in terminal with
R --version(Note: Restart terminals to load new environment variables)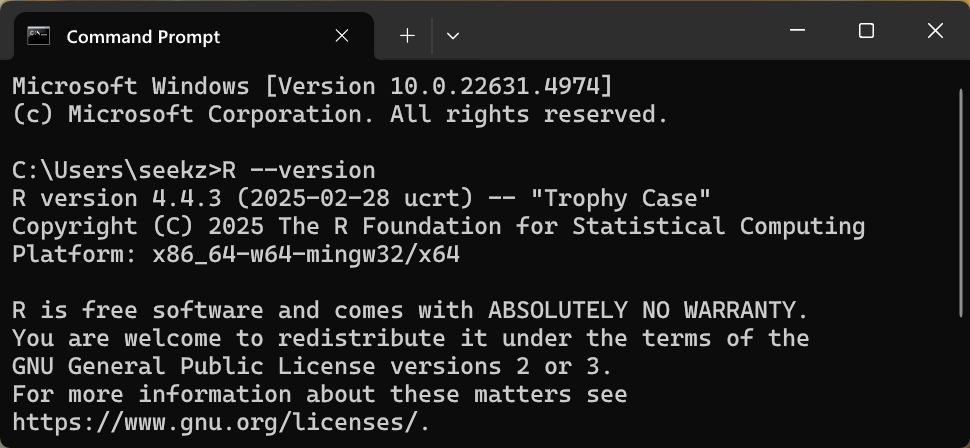
Install VSCode Extensions
- Open VS Code Extensions Marketplace (
Ctrl+Shift+X) - Search and install:
- R (by RStudio team)
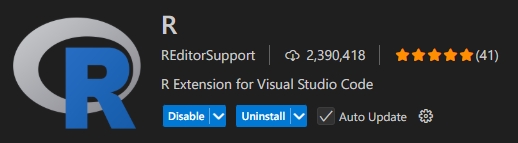
- R (by RStudio team)
Configuring R Extension
Set R Path
- Open VS Code Settings (
Ctrl+,), searchR: R Path - Specify R executable path with two options:
- Check the R installation path in the cmd command line
where R - Check the R installation path in the R command line
R.home()
- Check the R installation path in the cmd command line
Install Language Server
- Run in R terminal:
1install.packages("languageserver") - If encountering permission issues:
- Run R as administrator
- Or install to user library
Executing R Code
Interactive Execution
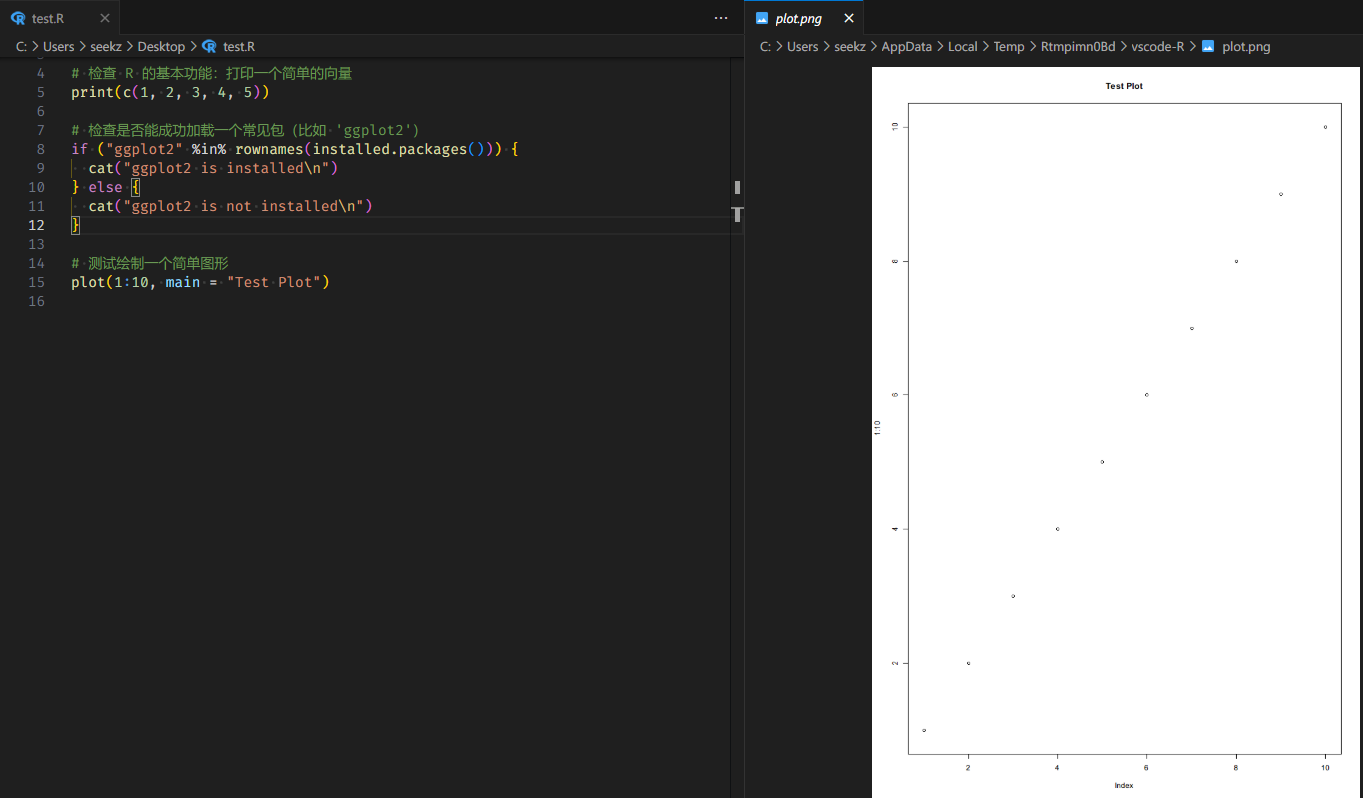
- Create/open
.Rfile1 2 3 4 5 6 7 8 9 10 11 12 13 14 15# 检查 R 版本 cat("R version:", R.version.string, "\n") # 检查 R 的基本功能:打印一个简单的向量 print(c(1, 2, 3, 4, 5)) # 检查是否能成功加载一个常见包(比如 'ggplot2') if ("ggplot2" %in% rownames(installed.packages())) { cat("ggplot2 is installed\n") } else { cat("ggplot2 is not installed\n") } # 测试绘制一个简单图形 plot(1:10, main = "Test Plot") - Use shortcuts:
Ctrl+Enter: Run current line/selectionCtrl+Shift+Enter: Execute entire file
- View results in integrated terminal
Graphical Output
- Install R package
httpgd1install.packages("httpgd") - Enable
R > Plot: Use Httpgdin VS Code settings
- The default drawing style in VS Code will change

Debugging R Code
Prerequisites
Install debugger package:
Install
R Debuggerextension
- The automatically generated
launch.jsonfile will contain the R debug configuration1 2 3 4 5 6 7 8 9 10 11 12 13 14 15 16 17 18 19 20 21 22 23 24 25 26 27 28 29 30 31 32 33 34 35 36 37 38 39 40 41 42 43 44 45 46 47 48 49 50{ // Use IntelliSense to learn about possible attributes. // Hover to view descriptions of existing attributes. // For more information, visit: https://go.microsoft.com/fwlink/?linkid=830387 "version": "0.2.0", "configurations": [ { "type": "R-Debugger", "name": "Launch R-Workspace", "request": "launch", "debugMode": "workspace", "workingDirectory": "${workspaceFolder}" }, { "type": "R-Debugger", "name": "Debug R-File", "request": "launch", "debugMode": "file", "workingDirectory": "${workspaceFolder}", "file": "${file}" }, { "type": "R-Debugger", "name": "Debug R-Function", "request": "launch", "debugMode": "function", "workingDirectory": "${workspaceFolder}", "file": "${file}", "mainFunction": "main", "allowGlobalDebugging": false }, { "type": "R-Debugger", "name": "Debug R-Package", "request": "launch", "debugMode": "workspace", "workingDirectory": "${workspaceFolder}", "includePackageScopes": true, "loadPackages": [ "." ] }, { "type": "R-Debugger", "request": "attach", "name": "Attach to R process", "splitOverwrittenOutput": true } ] }
- The automatically generated
Debugging Workflow
- Set Breakpoints : Click gutter area to create red markers
- Start Session : Press
F5or selectRun > Start Debugging - Debug Controls :
F5: Continue to next breakpointF10: Step overF11: Step intoShift+F11: Step outCtrl+Shift+F5: Restart debuggingShift+F5: Stop debugging
- Inspect debugging info :
- View values in
Variablespanel - Track call stack in
Call Stackpanel - Execute commands in
Debug Console
- View values in
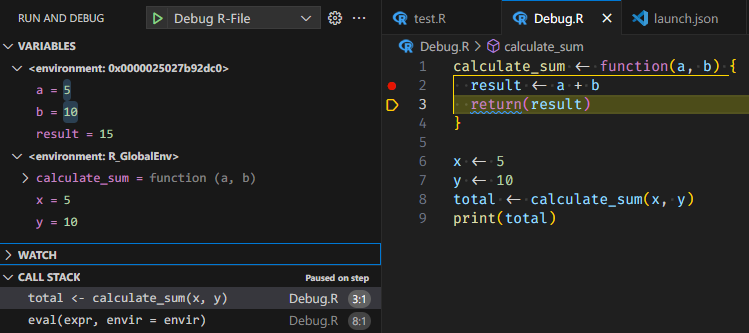
Debugging Example
Suppose you are debugging the following code (saved as test.R):
- Set a breakpoint at the line
result <- a + b. - Press
F5to start debugging, and the program will pause at the breakpoint. - Press
F10to step over and observe whether the value of the result variable is calculated correctly.
Advanced Debugging Techniques
- Conditional Breakpoints :
- Right-click on a breakpoint, select
Edit Breakpoint, and enter a condition expression (e.g.,a > 5).
- Right-click on a breakpoint, select
- Logpoints :
- Right-click on the line number, select
Add Logpoint, and enter a log message (e.g.,The value of variable a is {a}).
- Right-click on the line number, select
- Watch Expressions :
- Add custom expressions in the
Watchpanel to track their values in real-time.
- Add custom expressions in the
Additional Optimizations (Optional)
Code Completion and Formatting
- The R Extension plugin provides syntax highlighting and completion by default.
- To format code, install the
stylerpackage usinginstall.packages("styler"), and trigger formatting in VS Code with the shortcutShift+Alt+F.
Terminal Integration
Use radian to replace the default terminal (supports syntax highlighting). Radian is an enhanced R interactive terminal (REPL) designed to replace the default R terminal (such as Rterm or R console), providing a more modern and efficient command-line interaction experience. It is developed based on Python, combining the powerful features of R with the flexibility of the Python ecosystem, making it particularly suitable for users who frequently use the R command line for data analysis, debugging, or development.
| Feature | radian | Default R Terminal |
|---|---|---|
| Syntax Highlighting | ✅ Supported | ❌ Not available |
| Multi-line Editing | ✅ Direct input | ❌ Requires copy-paste or external editor |
| Auto-completion | ✅ Intelligent completion (supports functions, paths) | ✅ Basic only |
| History Search | ✅ Fuzzy search with Ctrl + R | ❌ Only up/down arrows |
| Theme Customization | ✅ Multiple color schemes | ❌ Fixed style |
| Python Integration | ✅ Direct call via reticulate | ❌ Requires additional setup |
| Cross-platform Consistency | ✅ Unified experience | ✅ Limited functionality |
Installation and Configuration
- Prerequisites
- Python 3.6+ installed and added to system PATH.
- R installed and added to system PATH.
- Install radian
Install via Python’s package manager pip:
pip install radian - Verify Installation
Enter
radianin the terminal, and if you see the colorful promptr$>, it indicates success. - Integrate with VS Code
- Modify the R terminal path in VS Code to radian (the radian path can be obtained using
where radianin the cmd command line). 
- If you do not wish to use radian, simply remove the path from VS Code settings.
- Modify the R terminal path in VS Code to radian (the radian path can be obtained using